atwood furnace troubleshooting guide
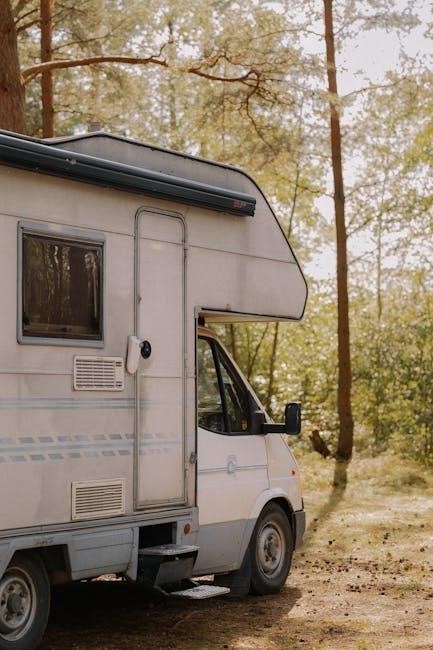
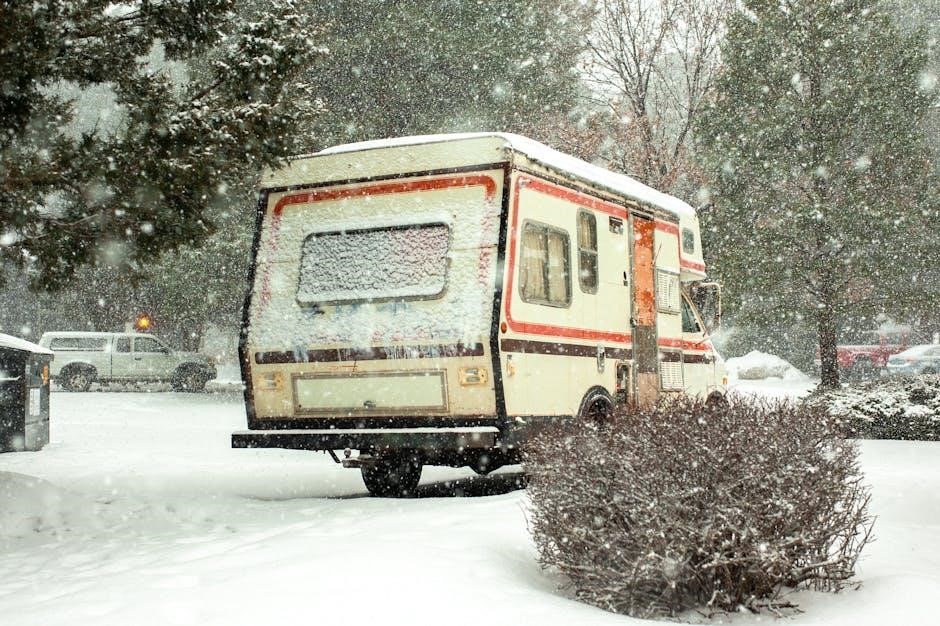
Navigating issues with your Atwood furnace requires a systematic approach. This guide provides essential steps for diagnosing and resolving common problems, ensuring comfortable heating in your RV.
Resources like YouTube videos and RV forums (irv2.com) offer valuable insights. Atwood’s training manuals (myrvworks.com) detail component functions and diagnostic procedures.
Understanding error codes and utilizing a multimeter are key to effective troubleshooting. Regular maintenance, including cleaning and filter replacement, prevents future failures.
Understanding Your Atwood Furnace
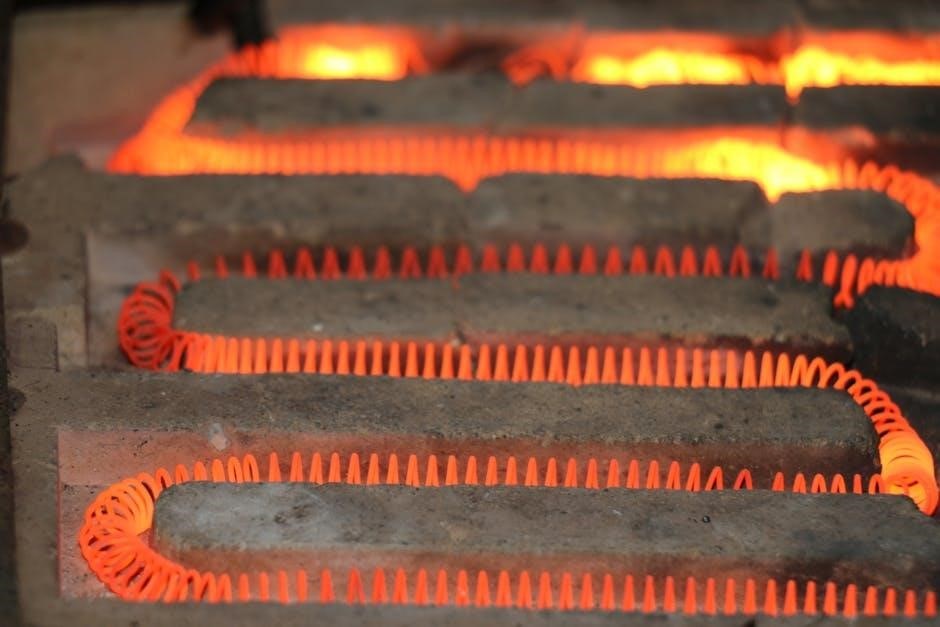
Atwood furnaces are a prevalent heating solution in recreational vehicles, known for their compact design and efficient operation. However, like any heating system, they can encounter issues requiring troubleshooting. Familiarizing yourself with the furnace’s core components is crucial for effective diagnosis.
The system typically includes a gas valve, a thermocouple or flame sensor, a blower motor, a circuit board, and a high-limit switch. These parts work in concert to ignite and maintain a flame, distributing warm air throughout the RV. Understanding how each component functions is the first step in resolving problems.
Atwood provides training manuals (myrvworks.com) detailing these functions. Recognizing common error codes, such as those for overheat protection or flame rollout, allows for targeted troubleshooting. Knowing the furnace model number is also vital, as specific components and procedures may vary.
Resources like RV forums (irv2.com) can offer model-specific advice. A basic grasp of gas and electrical systems is beneficial, but always prioritize safety when working with these components.
Safety Precautions
Working with RV furnaces involves potential hazards, demanding strict adherence to safety protocols. Before commencing any troubleshooting, always disconnect the power supply – both 120V AC and 12V DC – to prevent electrical shock. Gas leaks pose a significant risk; if you smell gas, immediately shut off the gas supply and ventilate the RV.
Never attempt repairs if you are uncomfortable or lack the necessary expertise. Improperly handled gas lines or electrical connections can lead to fires or explosions. Always use appropriate tools and wear safety glasses. Be mindful of hot surfaces, especially after the furnace has been running.
Ensure adequate ventilation during testing, as combustion produces carbon monoxide, a deadly gas. A carbon monoxide detector is essential in any RV with a gas-powered appliance. Consult Atwood’s training manuals (myrvworks.com) for specific safety guidelines related to your furnace model.
If unsure about any procedure, seek assistance from a qualified RV technician; Prioritize safety above all else when troubleshooting your Atwood furnace.
Tools Needed for Troubleshooting
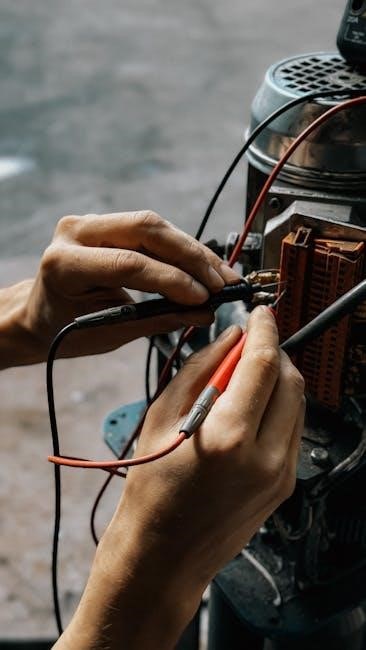
Effective Atwood furnace troubleshooting requires a specific set of tools for accurate diagnosis and repair. A multimeter is crucial for testing voltage, continuity, and resistance in electrical circuits. Screwdrivers (Phillips and flathead) are essential for accessing components. A socket set and wrenches are needed for gas line connections and securing parts.
A propane leak detector is vital for safely identifying gas leaks. Wire strippers and crimpers are necessary for electrical repairs. Electrical tape and wire connectors ensure secure connections. A vacuum cleaner helps remove debris from the burner and blower compartments.
A manometer is required for checking gas pressure, ensuring proper fuel delivery. Safety glasses protect your eyes from debris. Gloves provide hand protection. Referencing Atwood’s training manuals (myrvworks.com) can clarify specific tool requirements for your model. Having these tools readily available streamlines the troubleshooting process.
Common Atwood Furnace Problems
Frequent issues include no heat, pilot light failures, a non-functioning blower motor, and rapid cycling. These problems often stem from electrical or gas supply disruptions.
No Heat – Initial Checks
Begin by verifying the thermostat settings and ensuring it’s calling for heat. Confirm the furnace’s power switch is on and the RV’s main power supply is functioning correctly. Check the gas supply: is the propane tank full and the valve open? Inspect the gas line for any visible damage or kinks.
Next, examine the furnace’s circuit breaker or fuse. A tripped breaker or blown fuse will immediately halt operation. Listen for the click of the gas valve opening when the thermostat calls for heat – this indicates gas is reaching the furnace. If no click is heard, the gas valve may be faulty or receiving insufficient voltage.
Inspect the air filter; a clogged filter restricts airflow and can trigger the overheat protection. Finally, visually inspect the burner assembly for any obstructions or debris. Addressing these initial checks can often resolve simple no-heat situations before requiring more complex diagnostics.
Pilot Light Issues (If Applicable)
Older Atwood furnaces may utilize a pilot light. If the pilot light won’t stay lit, the most common culprit is a faulty thermocouple. The thermocouple senses the pilot flame and allows gas to flow to the burner; if it fails, the gas valve shuts off as a safety measure.
Carefully clean the pilot light assembly with a soft brush to remove any dust or debris that might be interfering with the flame. Check the pilot light orifice for blockage – a small piece of debris can extinguish the flame. If cleaning doesn’t resolve the issue, the thermocouple likely needs replacement.
Ensure proper ventilation around the furnace during operation, as insufficient airflow can also cause pilot light instability. Always follow the manufacturer’s instructions when relighting the pilot and exercise extreme caution when working with gas appliances. A consistently failing pilot light indicates a component malfunction requiring attention.
Blower Motor Not Working
A non-functioning blower motor prevents warm air distribution, even if the furnace is generating heat. Begin by checking the furnace’s circuit breaker or fuse – a tripped breaker or blown fuse is a simple fix. Inspect the blower motor capacitor; a bulging or leaking capacitor often indicates failure and requires replacement.
Use a multimeter to test the motor windings for continuity. If there’s no continuity, the motor is likely burned out and needs replacing. Verify the blower motor is receiving voltage when the thermostat calls for heat. A lack of voltage points to a wiring issue or a faulty control board.
Ensure the blower wheel isn’t obstructed by debris. Listen for any unusual noises when attempting to start the motor, which could indicate bearing failure. Always disconnect power before inspecting or working on the blower motor assembly for safety.
Furnace Cycling On and Off Rapidly
Rapid cycling, or short-cycling, indicates the furnace is frequently starting and stopping, preventing consistent heating. A common cause is a dirty air filter, restricting airflow and triggering the overheat protection. Inspect and replace the air filter as a first step.
Check the thermostat settings; ensure it’s not set to a very low temperature difference, causing frequent calls for heat. A faulty thermostat itself can also cause this issue. Examine the high-limit switch; if it’s tripping frequently, it suggests overheating due to restricted airflow or a malfunctioning component.
Inspect the gas valve and burner assembly for proper operation. Low gas pressure or a partially blocked burner can lead to incomplete combustion and cycling. Consider a professional inspection if the problem persists, as it could indicate a more complex issue with the control board or gas supply.
Diagnostic Codes & What They Mean
Atwood furnaces utilize error codes to pinpoint malfunctions. Understanding these codes – overheat, flame rollout, or lockout – is crucial for efficient diagnosis and repair procedures.
Error Code 1 – Overheat Protection
Error Code 1 signals the Atwood furnace has triggered its overheat protection system. This indicates the furnace has reached a dangerously high temperature, necessitating immediate investigation to prevent potential damage or fire hazards.
Several factors can contribute to this issue. Restricted airflow is a primary suspect; a clogged air filter or blocked vents impede proper heat dissipation. Inspect and replace the air filter as a first step. Ensure all vent openings, both intake and exhaust, are clear of obstructions like debris, snow, or ice.
A malfunctioning high-limit switch is another common cause; This switch is designed to cut power to the furnace when the set temperature threshold is exceeded. Testing the switch with a multimeter can confirm its functionality; A faulty blower motor, unable to circulate air effectively, can also lead to overheating. Finally, verify proper gas pressure, as an excessively rich fuel mixture can generate excessive heat.
Before attempting any repairs, disconnect power to the furnace. Addressing the root cause of the overheat is vital before resetting the system.
Error Code 2 – Flame Rollout
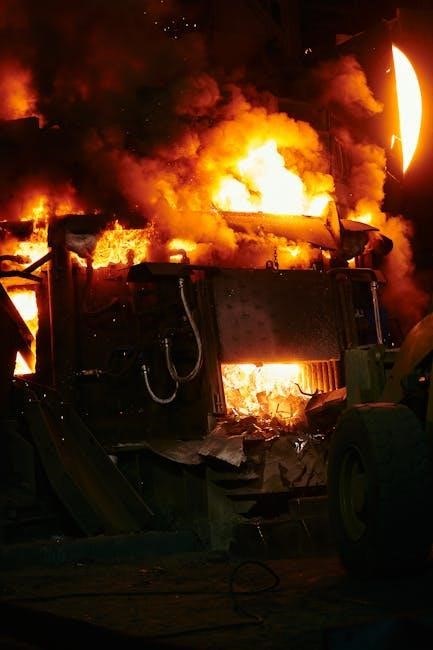
Error Code 2 on an Atwood furnace indicates a flame rollout condition, a serious safety concern. This means the flame is extending beyond the burner chamber, potentially igniting surrounding materials and posing a fire risk. Immediate action is crucial to address this issue.
Insufficient air for combustion is a primary cause. Check the air intake vents for obstructions – leaves, debris, or even snow can restrict airflow. A blocked vent prevents complete combustion, causing the flame to lift and roll out.
A faulty gas valve is another potential culprit. If the valve delivers too much gas, the flame can become unstable and roll out. Inspect the gas supply line for kinks or damage. A malfunctioning flame sensor may also contribute, failing to detect the flame properly and allowing excessive gas flow.
Do not attempt to operate the furnace until the problem is resolved. Disconnect power and gas supply before inspecting components. A professional RV technician should be consulted if you are uncomfortable performing these checks.
Error Code 3 – Lockout Condition
An Atwood furnace displaying Error Code 3 signifies a lockout condition, meaning the safety system has shut down the furnace to prevent a potentially hazardous situation. This typically occurs after multiple failed ignition attempts or detection of a persistent fault.
Low gas pressure is a common cause. Ensure the propane tank is adequately filled and the regulator is functioning correctly. Check for any restrictions in the gas line leading to the furnace. A weak battery can also trigger a lockout, as insufficient voltage hinders ignition.
A faulty thermocouple or flame sensor frequently contributes to lockouts. These components detect the presence of a flame; if they fail to signal flame detection, the gas valve shuts off, eventually leading to a lockout. Inspect wiring connections for corrosion or damage.
Resetting the furnace usually requires cycling the power switch off and on. However, if the underlying issue isn’t addressed, the lockout will likely recur. Professional diagnosis is recommended for persistent lockouts.
Error Code 4 – Low Voltage
An Error Code 4 on your Atwood furnace indicates insufficient voltage is reaching the unit. This is a critical safety feature, as low voltage can lead to incomplete combustion and the buildup of dangerous gases like carbon monoxide.
The primary suspect is often the RV’s battery system. Check the battery charge level; a significantly discharged battery won’t provide adequate power. Inspect battery terminals for corrosion and ensure they are securely connected. Consider testing the battery’s voltage under load.
Faulty wiring between the battery and the furnace is another potential cause. Look for loose connections, damaged wires, or corroded connectors along the circuit path. A weak ground connection can also contribute to voltage drop.
Excessive use of other 12V appliances simultaneously can strain the system. Try disconnecting non-essential devices to see if the furnace then operates correctly. If the problem persists, professional electrical diagnosis is advised.
Component-Specific Troubleshooting
Targeted diagnostics are crucial for pinpointing failures. Focus on the gas valve, thermocouple, circuit board, and high-limit switch for effective repair solutions.
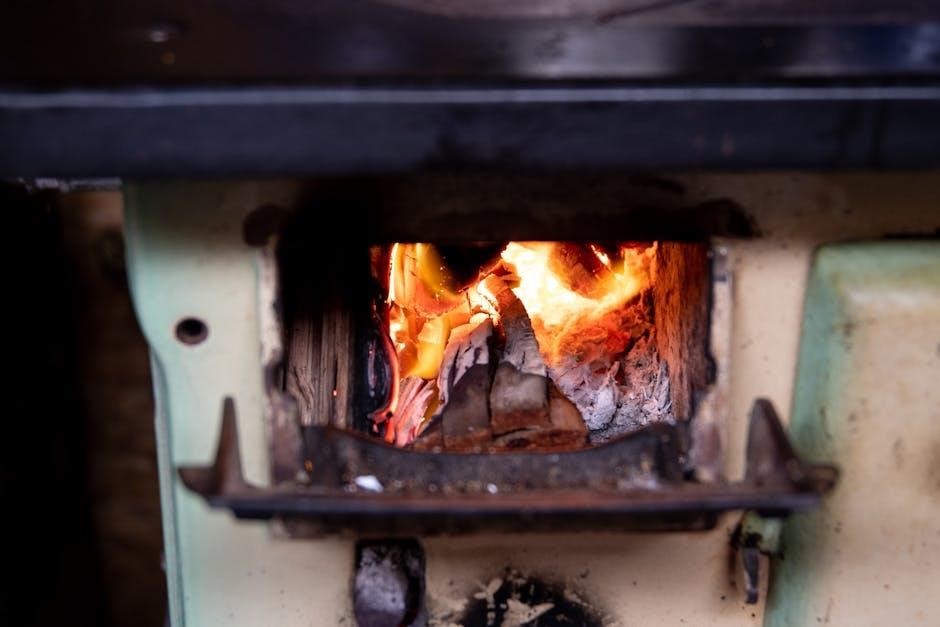
Gas Valve Troubleshooting
The gas valve regulates fuel flow to the burner, and issues here can prevent ignition or cause weak flames. Begin by visually inspecting the valve for any physical damage, corrosion, or leaks. A gas leak is a serious safety hazard, so proceed with extreme caution and ensure adequate ventilation.
Using a multimeter, check the voltage reaching the gas valve solenoid. Refer to the Atwood furnace wiring diagram (found in training manuals like the one on myrvworks.com) for the correct voltage specifications. If voltage is present but the valve doesn’t open, the solenoid may be faulty and require replacement.
Carefully examine the valve’s internal components if possible (after shutting off the gas supply!). Look for obstructions or debris hindering its operation. A professional RV technician should handle any complex gas valve repairs due to the inherent risks involved. Always prioritize safety when working with gas appliances.
Remember to test for gas leaks after any repair or adjustment using a leak detection solution.
Thermocouple/Flame Sensor Issues
The thermocouple or flame sensor is crucial for safety, verifying a stable flame and allowing continued gas flow. If the sensor fails to detect a flame, the gas valve shuts off, preventing potential hazards like gas buildup. A common symptom of a faulty sensor is a pilot light that repeatedly goes out.
Inspect the thermocouple for corrosion, dirt, or physical damage. Gently clean the sensor with fine steel wool or sandpaper to remove any buildup that might interfere with its operation. Ensure the sensor is positioned correctly within the flame path for optimal detection.
Using a multimeter, test the thermocouple’s millivolt output while the burner is lit. Refer to the Atwood furnace training manual (available on myrvworks.com) for the correct voltage range. A low or erratic reading indicates a failing sensor needing replacement.
Always disconnect the gas supply before handling the thermocouple or flame sensor. Proper sensor function is vital for safe and reliable furnace operation.
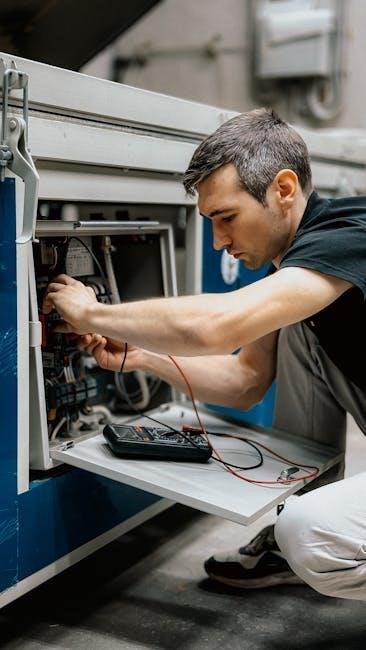
Circuit Board Diagnostics
The circuit board acts as the brain of the Atwood furnace, controlling all functions from ignition to blower operation. Diagnosing circuit board issues requires a systematic approach, often involving visual inspection and voltage testing. A failing board can manifest in various ways, including no heat, erratic operation, or persistent error codes.
Begin by visually inspecting the board for burnt components, cracked solder joints, or any signs of physical damage. Look for swollen capacitors, which are a common failure point. Carefully check all wiring connections to ensure they are secure and free of corrosion;
Using a multimeter, test the voltage at various points on the board according to the wiring diagram. Refer to Atwood’s training materials (myrvworks.com) for specific test points and expected values.
If the board appears damaged or voltages are incorrect, replacement is usually necessary. Exercise caution when handling electrical components and always disconnect power before working on the circuit board.
High Limit Switch Problems
The high limit switch is a crucial safety device designed to prevent overheating within the Atwood furnace. When the furnace reaches an unsafe temperature, the switch interrupts power to the gas valve, shutting down the system. Frequent tripping of the high limit switch indicates an underlying issue that needs addressing.
Common causes include restricted airflow, a malfunctioning blower motor, or a buildup of debris around the heat exchanger. Before replacing the switch, investigate these potential problems. Ensure the air filter is clean and the vent system is unobstructed.
To test the switch, use a multimeter to check for continuity when the furnace is cool. If the switch shows no continuity, it’s likely faulty and requires replacement.
Always address the root cause of the overheating before installing a new high limit switch. Ignoring the underlying problem will likely result in the new switch failing prematurely, potentially creating a hazardous situation.
Maintenance & Prevention
Proactive care extends your Atwood furnace’s life. Regular cleaning, air filter changes, and gas line inspections prevent issues and ensure efficient, safe operation.
Regular Cleaning Procedures
Maintaining a clean Atwood furnace is crucial for optimal performance and safety. Dust and debris accumulation can lead to reduced efficiency, overheating, and even potential fire hazards. Begin by always disconnecting the power source – both gas and electricity – before commencing any cleaning activities.
Carefully vacuum the furnace’s exterior, paying close attention to vents and louvers where dust tends to collect. Use a soft brush attachment to avoid damaging delicate components. Internally, gently vacuum the burner assembly and combustion chamber, removing any loose particles. Avoid using water or harsh chemical cleaners, as these can corrode sensitive parts.
Inspect the blower wheel for debris and clean it thoroughly. A clogged blower wheel restricts airflow, impacting heating efficiency. Periodically check the flue pipe for obstructions and ensure it’s securely connected. A blocked flue pipe can cause dangerous carbon monoxide buildup. Remember to reassemble everything carefully and test the furnace after cleaning to confirm proper operation.
Air Filter Replacement
A clean air filter is paramount for efficient furnace operation and indoor air quality. A clogged filter restricts airflow, forcing the furnace to work harder, reducing heating output, and potentially causing overheating. Regular replacement is non-negotiable.
Locate the air filter, typically found near the furnace’s return air intake. Turn off the furnace’s power before accessing the filter. Carefully remove the old filter, noting its size and orientation for correct installation of the new one. Inspect the old filter; excessive dirt indicates more frequent replacement is needed.
Install a new filter of the correct size and type. Ensure it’s properly seated to prevent air leakage. Generally, filters should be replaced every 30-90 days, depending on usage and environmental conditions. Consider using a higher-efficiency filter for improved air quality, but be mindful of potential airflow restriction. Always check your furnace manual for specific filter recommendations.
Gas Line Inspection
A thorough gas line inspection is crucial for safety and optimal furnace performance. Leaks pose a significant fire and carbon monoxide hazard, demanding meticulous attention. Always prioritize safety – if you smell gas, immediately shut off the supply and evacuate!
Visually inspect the gas line from the propane tank or supply source to the furnace. Look for corrosion, damage, or loose connections. Use a soap and water solution to check for leaks – apply it to fittings and joints; bubbles indicate a leak. Never use a flame to check for leaks!
Ensure all connections are tight, but avoid over-tightening. Inspect the gas shut-off valve for proper operation. If you detect any leaks or suspect a problem, contact a qualified RV technician or gas professional for repair. Regular inspections, at least annually, are highly recommended to maintain a safe and reliable heating system.
Ventilation System Check
Proper ventilation is paramount for safe and efficient Atwood furnace operation. Incomplete combustion due to inadequate airflow produces dangerous carbon monoxide. Regularly inspect the furnace’s vent pipe, ensuring it’s free from obstructions like bird nests, debris, or damage.
Verify the vent pipe is securely connected to the furnace and terminates correctly outside the RV. Check for any cracks or holes in the vent pipe, which could allow exhaust gases to enter the living space. Ensure the vent opening is not blocked by anything, including snow or foliage.
Inspect the air intake vents as well, confirming they are clear and unobstructed. Proper airflow is essential for the furnace to draw in sufficient oxygen for combustion. A blocked vent can cause inefficient burning and potential safety hazards. Annual professional inspection of the entire ventilation system is highly advisable;
Advanced Troubleshooting
Complex issues demand specialized tools and knowledge. Utilizing a multimeter, checking gas pressure, and interpreting wiring diagrams are crucial for diagnosing intricate problems.
Control module identification and replacement often require professional expertise for accurate repair and safe operation of the Atwood furnace.
Using a Multimeter for Testing
A multimeter is an indispensable tool for pinpointing electrical faults within your Atwood furnace. Before commencing, ensure the furnace is disconnected from power to prevent electrical shock. Begin by testing the voltage at the input terminals to verify power supply.
Continuity testing is vital for checking wiring and components. Disconnect the wire before testing for continuity; a lack of continuity indicates a break in the circuit. Test the high-limit switch, gas valve solenoid, and the flame sensor for proper operation.
Resistance measurements can reveal faulty components. Compare readings against the manufacturer’s specifications, found in the Atwood training manual (myrvworks.com). A significantly different resistance value suggests a defective part.
Carefully probe connections, ensuring a secure contact for accurate readings. Remember to set the multimeter to the appropriate range (voltage, continuity, or resistance) before testing. Always consult a qualified technician if you are uncomfortable performing electrical tests.
Checking Gas Pressure
Proper gas pressure is crucial for efficient and safe furnace operation. This task requires specialized equipment and should ideally be performed by a qualified RV technician due to the inherent risks involved with gas systems.
First, ensure all other gas appliances are turned off to avoid interference with the pressure reading. Connect a manometer to the gas supply line leading to the furnace, following the manufacturer’s instructions.
Ignite the furnace and observe the manometer reading. Compare the measured pressure to the specification listed in the Atwood furnace training manual (myrvworks.com) or on the furnace’s data plate.
Low gas pressure can cause incomplete combustion and no heat, while excessive pressure can lead to a dangerous situation. If the pressure is outside the acceptable range, do not operate the furnace and consult a professional for adjustment or repair.
Wiring Diagram Interpretation
Understanding the Atwood furnace wiring diagram is essential for diagnosing electrical issues. These diagrams, often found within the furnace’s service manual or online resources like myrvworks.com, illustrate the connections between components.
Begin by identifying the key components: the control module, gas valve, blower motor, thermocouples, and safety switches. Trace the wires connecting these components, noting their color codes and functions.
Pay close attention to the symbols used in the diagram. These represent different electrical components and connections. A break in the wiring, a loose connection, or a faulty component can be identified by following the circuit path;
Use a multimeter to test continuity and voltage at various points in the circuit, comparing your readings to the expected values indicated in the diagram. Careful interpretation allows for targeted repairs.
Identifying and Replacing the Control Module
The control module is the brain of the Atwood furnace, regulating all functions. Identifying a faulty module requires systematic troubleshooting, often after eliminating other potential causes like gas supply or wiring issues.
Symptoms of a failing control module include erratic operation, failure to ignite, or persistent error codes. Utilize a multimeter to test the module’s input and output voltages, comparing them to specifications found in service manuals (myrvworks.com).
Before replacing, carefully document the wiring connections to the existing module. Disconnect the power supply and carefully remove the old module.
Install the new control module, ensuring all wires are securely connected according to your documentation. Restore power and test the furnace operation. Proper replacement restores system functionality.