coleman steel pro pool instructions
Welcome to the Coleman Steel Pro Pool setup guide! This comprehensive manual helps you install‚ maintain‚ and enjoy your pool safely and efficiently.
Filled with step-by-step instructions‚ safety tips‚ and troubleshooting advice‚ this guide ensures your Coleman Steel Pro Pool provides years of fun and relaxation for your family.
1.1 Overview of the Coleman Steel Pro Pool
The Coleman Steel Pro Pool is a high-quality‚ durable above-ground pool designed for easy setup and long-lasting enjoyment. Featuring a sturdy steel frame and a puncture-resistant liner‚ it offers a safe and fun swimming experience for both kids and adults. With its robust construction and user-friendly design‚ it’s an excellent choice for families seeking a reliable and entertaining backyard pool solution.
1.2 Importance of Following Instructions
Following the instructions for your Coleman Steel Pro Pool is crucial for ensuring a safe and enjoyable experience. Proper setup prevents hazards‚ ensures structural integrity‚ and avoids potential leaks or damage. Adhering to the guidelines helps maintain the pool’s durability and longevity‚ while also safeguarding users from accidents. Always prioritize safety by strictly following the provided manual and supervision requirements.
Safety Precautions
Ensure a safe environment by maintaining proper supervision‚ adhering to safety guidelines‚ and avoiding potential hazards when setting up and using your Coleman Steel Pro Pool.
2.1 General Safety Tips
Always supervise children near the pool‚ especially those under 5‚ as drowning risks are highest. Ensure the pool is at least 6 feet away from electrical outlets. Install barriers and warning signs to prevent accidents. Regularly inspect the pool and ladder for damage. Follow all safety guidelines in the manual to ensure a secure and enjoyable experience for everyone.
2.2 Supervision Requirements
Adult supervision is mandatory when children are using the pool. Ensure no diving signs are visible and teach users proper ladder etiquette. Only one person should use the ladder at a time. Regularly check pool surroundings for hazards and maintain fencing or barriers as required by local regulations to ensure a safe environment for all users.
Unpacking and Inventory
3.1 Checking the Contents
Carefully inspect all components‚ including the pool frame‚ liner‚ pump‚ filter‚ and ladder. Cross-reference each item with the provided manual to ensure completeness and condition.
Begin by carefully unboxing and inspecting all components‚ including the pool frame‚ liner‚ pump‚ filter‚ ladder‚ and hardware. Check each item against the manual’s parts list to ensure nothing is missing or damaged. Look for any signs of wear‚ dents‚ or tears‚ especially on the liner and metal parts. Organize components by category to streamline the assembly process. This step is crucial for a smooth and successful setup.
3.2 Tools and Parts Identification
Familiarize yourself with the tools and parts provided. The kit typically includes bolts‚ nuts‚ connectors‚ and metal frames. Essential tools like a wrench‚ screwdriver‚ and Allen key are often required. Refer to the manual for labeled diagrams to identify each part accurately. Proper identification ensures all components are used correctly‚ preventing assembly errors and enhancing safety during setup. Organize parts by type to maintain order.
Site Preparation
Select a flat‚ dry location for your pool‚ ensuring it is level and free from debris. Clear the area of any obstructions and ensure proper drainage.
4.1 Choosing the Right Location
Selecting a suitable location for your Coleman Steel Pro Pool is crucial. Ensure the area is level ground to prevent uneven installation and potential damage. Avoid low-lying spots where water may collect. Keep the pool at least 6 feet away from electrical outlets and follow local safety guidelines. Choose a spot with good drainage to prevent water accumulation around the pool.
4;2 Leveling the Ground
Ensure the ground is completely level before assembling your Coleman Steel Pro Pool. Clear the area of rocks‚ grass‚ and debris. Use a spirit level to check evenness. If necessary‚ dig slightly uneven areas or fill low spots with sand. Firmly tamp the ground to create a stable surface. Proper leveling ensures the pool’s structural integrity and prevents damage during use. Double-check all sides for accuracy.
Frame Assembly
Begin by unfolding and aligning the frame parts. Use the provided tools to secure the connections firmly. Follow the sequence outlined in the manual for stability.
5.1 Unfolding and Aligning the Frame
Start by carefully unfolding the pool frame on a flat‚ level surface. Ensure all parts are properly aligned and facing the correct direction. Place the pool in direct sunlight for at least an hour to increase flexibility‚ making assembly easier. Double-check the orientation of each component before securing connections. Refer to the manual for specific alignment markers to ensure accuracy.
5.2 Connecting the Frame Parts
Begin by attaching the base components‚ ensuring all connections are secure. Use the provided wrench to tighten bolts firmly but avoid over-tightening. Align each part carefully‚ referencing the manual for correct assembly. Ensure vertical frames are perpendicular to the ground to prevent deformation. Double-check all joints for stability before moving forward. Proper alignment ensures a safe and durable pool structure.
Liner Installation
Place the liner inside the frame‚ starting from the center and smoothing outward to eliminate wrinkles. Secure it tightly to the pool’s edge using provided clips or straps‚ ensuring a snug fit. Proper installation prevents leaks and ensures a durable setup for years of enjoyment.
6.1 Placing the Liner
Place the liner inside the pool frame carefully‚ ensuring it is right side up. Start at the center and smooth outward to remove any air pockets or wrinkles. Use the provided clips or straps to secure the liner tightly around the pool’s edge‚ ensuring a snug fit. Proper placement prevents leaks and extends the liner’s lifespan‚ ensuring a safe and enjoyable swimming experience.
6;2 Smoothing Out Wrinkles
Gently pull the liner taut and smooth out wrinkles by hand or with a soft tool‚ working from the center outward; Ensure even pressure to eliminate air pockets. Repeat this process as you fill the pool‚ adjusting the liner as needed. Proper smoothing prevents damage and ensures a snug‚ even fit for safe and efficient pool operation.

Filling the Pool
Begin filling the pool with a hose‚ placing the ladder inside as water rises. Smooth wrinkles and monitor the water level to ensure proper setup and safety.
7.1 Initial Filling Process
Start filling the pool with a garden hose‚ ensuring the ladder is placed inside as water rises. Smooth out any wrinkles in the liner to prevent air pockets and ensure even expansion. Monitor the water level closely‚ stopping when it reaches the recommended height to avoid overfilling and potential damage to the pool structure.
7.2 Monitoring the Water Level
Regularly check the water level during and after filling to ensure it does not exceed the maximum fill line. Overfilling can cause damage to the pool or liner. Use a skimmer or bucket to remove excess water if needed. Maintain the recommended water level for optimal pool performance and safety‚ ensuring all components function correctly throughout the season.
Installing Accessories
Install the ladder and pump/filter according to the provided instructions; Ensure all connections are secure and follow safety guidelines for proper setup and functionality;
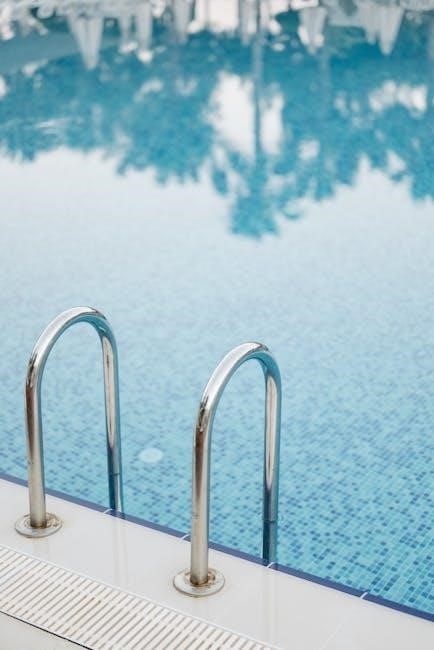
8.1 Setting Up the Ladder
Assemble the ladder according to the provided instructions. Place it inside the pool as the water level rises‚ ensuring stability. Secure all connections firmly and ensure the ladder faces the correct direction for safe entry and exit. Always follow safety guidelines‚ such as allowing only one person at a time on the ladder.
8.2 Installing the Pump and Filter
Attach the pump to the pool’s filter system‚ ensuring all connections are secure. Connect the inlet and outlet hoses to the appropriate ports. Tighten all fittings firmly to prevent leaks. Plug in the pump and test the water flow. Monitor the system to ensure proper function and clean water circulation. Always follow the manufacturer’s guidelines for optimal performance and safety.
Maintenance
Regularly clean the pool and skimmer to ensure optimal performance. Check for leaks and maintain proper chemical balance for safe and clear water conditions.
9.1 Regular Cleaning
Regular cleaning is essential for maintaining your Coleman Steel Pro Pool. Use a skimmer to remove floating debris and vacuum the pool floor weekly. Clean the filter according to the manufacturer’s instructions to ensure proper water circulation. Check and maintain chemical balance to prevent algae growth and keep the water safe for swimming. Regular maintenance prevents damage to pool components and ensures a clean‚ enjoyable experience.
9.2 Checking for Leaks
Regularly inspect the pool and its equipment for signs of leaks‚ such as water loss or dampness around connections. Use a leak detection kit or food coloring to identify escaping water. Address any issues promptly to prevent further damage.
If a leak is found‚ turn off the pump and drain the pool slightly. Small leaks can often be repaired with a vinyl patch kit‚ while larger issues may require professional assistance to ensure the pool remains safe and functional.
9.3 Chemical Balance
Maintaining proper chemical balance is essential for swimmer safety and pool longevity. Test the water regularly for pH‚ chlorine‚ and alkalinity levels; Adjust as needed to keep pH between 7.2-7.8 and chlorine levels at 1-3 ppm. Imbalanced chemicals can cause eye irritation or damage equipment. Use balancers or sanitizers as required to maintain a safe and healthy swimming environment.
Winterization
Drain the pool and clean thoroughly before storing. Disconnect and store equipment in a dry place. Ensure all parts are clean and dry to prevent damage.
10.1 Draining the Pool
To winterize your Coleman Steel Pro Pool‚ start by draining the water using the built-in drain valve. Attach a garden hose to direct water away from the pool area. Ensure the pool is completely empty to prevent ice damage. Remove any remaining water with a pump or sponges. Clean the pool floor and walls thoroughly before storing the liner and frame. Always follow the manufacturer’s instructions for proper draining techniques to maintain your pool’s integrity and longevity.
10.2 Storing the Pool Equipment
After draining‚ clean and dry all pool equipment‚ including the pump‚ filter‚ and ladder. Store them in a dry‚ protected area to prevent rust or mold. Use labeled boxes for small parts to avoid loss. Ensure the pool liner and frame are properly folded and stored separately. This ensures everything remains in good condition for the next swimming season. Always follow the manufacturer’s storage guidelines for optimal preservation.
Troubleshooting
Identify common issues like leaks or wrinkles in the liner. Check connections for tightness and ensure the pool is level. Refer to the manual for specific solutions to ensure your Coleman Steel Pro Pool operates smoothly and safely.
11.1 Identifying and Fixing Leaks
To identify leaks in your Coleman Steel Pro Pool‚ start by conducting a dye test. Add food coloring or a dye tablet to the water and observe where the color concentrates‚ indicating the leak’s location. Inspect the liner for visible tears or weak spots‚ and check frame connections for tightness. For small punctures‚ use a patch kit with adhesive and patches‚ ensuring the area is clean and dry. For larger damage‚ consider professional assistance or use underwater epoxy. Regular maintenance‚ such as cleaning and inspecting fittings‚ helps prevent future leaks. Always refer to your manual for specific repair guidance and ensure all repairs are done safely and effectively to maintain your pool’s integrity and longevity.
11.2 Common Issues and Solutions
Common issues with the Coleman Steel Pro Pool include liner wrinkles‚ frame misalignment‚ and pump malfunctions. To fix wrinkles‚ gently smooth the liner while the pool is partially filled. For frame alignment‚ adjust the legs and ensure the ground is level. If the pump isn’t working‚ check connections and power supply. Regular maintenance and prompt addressing of issues ensure optimal performance and longevity of your pool.

Safety Guidelines
Install fencing around the pool and ensure constant adult supervision for children. Place warning signs and adhere to local safety regulations to prevent accidents and ensure compliance.
12.1 Barrier Requirements
A barrier must surround the pool to prevent unauthorized access. The barrier should be at least 48 inches tall‚ with a self-latching gate. Ensure no gaps exceed 4 inches to prevent children from slipping through. Additionally‚ install pool alarms and door barriers for extra safety. Regularly inspect the barrier to maintain its integrity and effectiveness in preventing accidental drowning incidents.
12.2 Local Regulations Compliance
Always comply with local building codes and regulations when installing your Coleman Steel Pro Pool. Check with your local authorities for specific requirements‚ such as permits‚ fencing standards‚ and electrical safety guidelines. Ensure all installations meet these standards to avoid legal issues and ensure a safe environment for pool use. Compliance is crucial for both safety and legal reasons.
Congratulations! You’ve successfully set up your Coleman Steel Pro Pool. Enjoy safe and responsible pool use while creating lasting memories with family and friends.
13.1 Enjoying Your Pool Responsibly
Ensure a safe and enjoyable experience by following all safety guidelines and maintaining regular pool upkeep. Always supervise children and install proper barriers to prevent accidents. Adhere to local regulations and guidelines for pool use. By taking these steps‚ you’ll create a fun and secure environment for everyone to enjoy your Coleman Steel Pro Pool responsibly.

Additional Resources
For detailed guides‚ manuals‚ and troubleshooting tips‚ visit the official Coleman website. Contact customer support for assistance with your Coleman Steel Pro Pool and resources.
14.1 Manuals and Guides
The official Coleman Steel Pro Pool manuals provide detailed instructions for installation‚ maintenance‚ and troubleshooting. Available online‚ these guides include step-by-step tutorials‚ safety precautions‚ and parts lists. Refer to these resources for a comprehensive understanding of your pool’s setup and care to ensure optimal performance and longevity. Visit the Coleman website to download the latest versions of these essential documents.
14.2 Customer Support Contact
For any inquiries or assistance with your Coleman Steel Pro Pool‚ contact Coleman’s customer support team. Visit their official website for contact details‚ including phone numbers‚ email‚ and live chat options; Additionally‚ refer to the manual for troubleshooting guides and video tutorials for addressing common issues. Their dedicated support ensures your pool experience remains enjoyable and stress-free.
Visual Aids
Access setup videos and instructional diagrams online to guide you through installation‚ maintenance‚ and troubleshooting. These visual resources complement the written instructions for a clearer understanding.
15.1 Setup Videos
Watch detailed setup videos on platforms like YouTube for step-by-step guidance on assembling your Coleman Steel Pro Pool. These videos cover frame assembly‚ liner installation‚ and troubleshooting‚ making complex tasks easier to understand. Designed for all skill levels‚ they provide visual demonstrations to ensure a smooth and correct installation process. Refer to these resources for clarity and confidence during your pool setup journey.
15.2 Instructional Diagrams
Refer to the instructional diagrams provided in the Coleman Steel Pro Pool manual for visual guidance. These diagrams illustrate key steps like frame assembly‚ liner placement‚ and accessory installation‚ ensuring clarity and accuracy. Use them alongside written instructions to visualize each part and connection‚ making the setup process more intuitive and efficient for a successful pool installation.
Final Checks
Inspect the pool frame‚ liner‚ and connections for tightness and alignment. Ensure all safety features and accessories are securely installed. Verify no leaks and proper water level before first use.
16.1 Pre-Use Inspection
Before first use‚ inspect the pool frame for stability and ensure all bolts are tightened. Check the liner for any wrinkles or damage. Verify the ladder is secure and properly positioned. Test the pump and filter system to ensure they’re functioning correctly. Inspect all connections for leaks and ensure the water level is at the recommended height. This step ensures a safe and enjoyable experience for everyone.