tie dye tulip instructions
Discover the vibrant world of tie-dye with Tulip kits! Perfect for parties or solo projects‚ these easy-to-use sets bring creativity to life with stunning results.
What is Tie-Dye?
Tie-dye is a traditional textile technique where fabric is folded‚ tied‚ or bound to create resistance areas‚ preventing dye from penetrating evenly. This method produces unique‚ vibrant patterns. Popularized globally‚ tie-dye has become a symbol of creativity and self-expression. The process involves soaking fabric‚ applying dye‚ and allowing it to set. Tulip kits simplify this art‚ offering pre-mixed colors and easy-to-follow instructions. Whether for clothing‚ accessories‚ or home decor‚ tie-dye inspires endless possibilities. Its resurgence in modern fashion and DIY culture highlights its timeless appeal‚ making it accessible to crafters of all skill levels. Tie-dye is more than a trend—it’s a celebration of individuality and artistry.
Why Choose Tulip for Tie-Dye?
Tulip is a top choice for tie-dye enthusiasts due to its high-quality‚ easy-to-use kits. The one-step process eliminates the need for presoaking‚ making it accessible to all skill levels. With vibrant‚ long-lasting colors and a wide range of shades‚ Tulip ensures professional-looking results. The kits are perfect for parties‚ DIY projects‚ or creative solo adventures. Tulip’s popularity stems from its innovative approach‚ combining tradition with modern convenience. Whether you’re a beginner or an experienced crafter‚ Tulip’s tie-dye products offer the tools to create unique‚ eye-catching designs effortlessly. Their commitment to quality and simplicity makes them a favorite for crafting memorable tie-dye experiences.
Benefits of Using Tulip Tie-Dye Kits
Tulip Tie-Dye Kits offer vibrant‚ long-lasting colors and a user-friendly experience. They include everything needed for a project‚ from dyes to gloves‚ making them perfect for parties or solo crafting. The one-step process simplifies creation‚ eliminating the need for presoaking fabrics. With a wide range of colors‚ you can achieve unique‚ professional-looking designs. Tulip kits are safe for all ages and ideal for beginners and experienced crafters alike. Their convenience and quality make them a top choice for DIY enthusiasts‚ ensuring memorable and creative tie-dye experiences. Whether for fashion‚ home decor‚ or gifts‚ Tulip kits deliver stunning results every time.

Materials Needed for Tie-Dye Tulip
The Tulip Tie-Dye Kit includes everything needed: vibrant dye bottles‚ gloves‚ rubber bands‚ and instructions. Additional items like protective coverings and water are also recommended for setup.
Essential Supplies for Tulip Tie-Dye
The Tulip One-Step Tie-Dye Party Kit is a must-have‚ featuring 18 vibrant dye bottles‚ gloves‚ rubber bands‚ and detailed instructions. Additional essentials include a protective work surface‚ water‚ and washing supplies. The kit’s one-step process eliminates the need for pre-soaking‚ making it user-friendly. Optional items like plastic bags or buckets can enhance the dye-setting process. With these supplies‚ you’re ready to create unique‚ colorful designs effortlessly. The Tulip kit is perfect for beginners and experienced crafters alike‚ ensuring professional-quality results every time. Its convenience and comprehensive inclusion make it a top choice for tie-dye enthusiasts.
Optional Tools for Advanced Designs
For more intricate patterns‚ consider adding tools like plastic bags‚ buckets‚ or additional folding materials. These can help create unique effects and improve dye distribution. Gloves and extra rubber bands are also useful for complex folds. Advanced techniques‚ such as Itajime folding‚ require precision tools to achieve sharp creases. While the Tulip kit provides essentials‚ these optional items allow for greater creativity and control. Experimenting with different tools can elevate your designs‚ making each piece truly one-of-a-kind. These additions are perfect for crafters looking to push the boundaries of tie-dye artistry and explore new visual possibilities with their projects.
Step-by-Step Guide to Tie-Dye Tulip
Follow a comprehensive guide to create vibrant designs with Tulip kits. Learn preparation‚ folding‚ dye mixing‚ application‚ and waiting times for professional tie-dye results‚ perfect for all skill levels.
Preparing the Work Area
Start by covering your workspace with plastic sheets or old towels to protect surfaces from dye stains. Wear old clothes or an apron to avoid ruining your attire. Put on gloves to prevent skin staining. Ensure good ventilation to avoid inhaling dye fumes. Gather all supplies‚ including the Tulip Tie-Dye Kit‚ rubber bands‚ buckets‚ and protective gear. Lay out fabrics and tools within easy reach to streamline the process. Proper preparation ensures a smooth and enjoyable tie-dye experience‚ allowing you to focus on creating unique designs without interruptions or messes.
Washing and Preparing the Fabric
Before starting‚ wash the fabric in warm water to remove any finishes that might affect dye absorption. Do not use fabric softeners‚ as they can hinder color adhesion. Dry the fabric thoroughly‚ but avoid using a dryer to prevent shrinkage. For natural fibers like cotton or linen‚ Tulip Tie-Dye Kits work best. Remove any buttons or zippers to ensure even dye distribution. If using the Tulip One-Step Tie-Dye Kit‚ pre-washing is sufficient—no need to soak in soda ash. Pat the fabric dry with a towel‚ but do not iron it. Properly prepared fabric ensures vibrant‚ long-lasting colors in your tie-dye design.
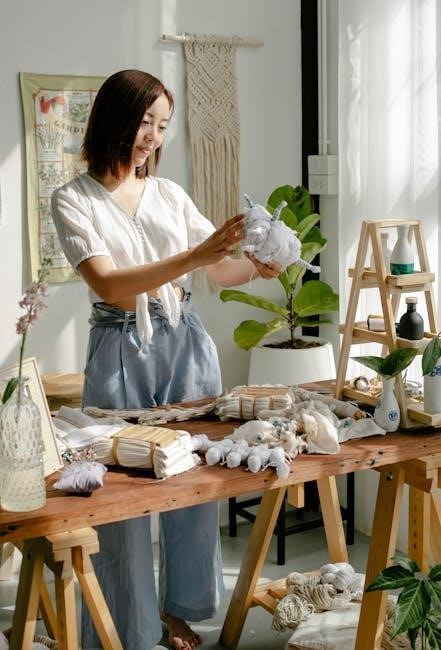
Folding Techniques for Unique Patterns
Explore various folding techniques to create distinctive tie-dye designs. The spiral fold involves twisting fabric into a circular shape‚ while the accordion fold creates stripes by folding fabric into pleats. For a bullseye pattern‚ fold fabric into concentric circles. Binding with rubber bands ensures the dye penetrates evenly. Experiment with different folds to achieve unique effects. Tulip Tie-Dye Kits simplify the process‚ allowing you to focus on creativity. Proper folding ensures vibrant‚ intricate designs. Try combining folds for even more dynamic results. With practice‚ you can master these techniques to produce stunning‚ one-of-a-kind tie-dye creations every time.
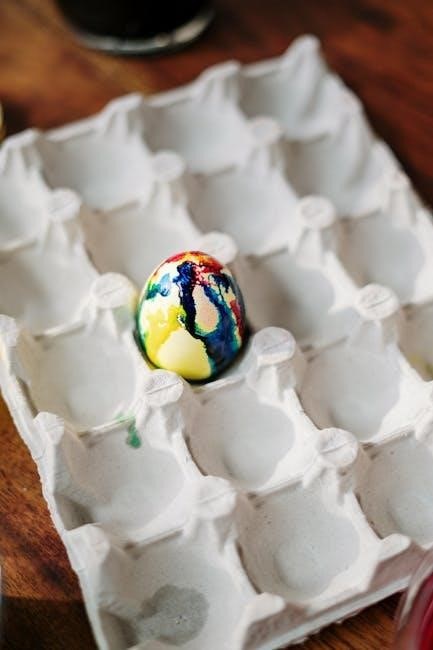
Mixing the Tulip Tie-Dye Colors
Mixing Tulip Tie-Dye colors is a straightforward process that ensures vibrant results. Simply add water to the dye bottles‚ shake well‚ and the one-step formula eliminates the need for pre-soaking fabrics in soda ash. This convenient method allows for intense color saturation. For custom shades‚ combine different Tulip colors before applying. Always follow the instructions provided with the kit for optimal results. The easy-to-use design of Tulip Tie-Dye Kits makes mixing a breeze‚ ensuring consistent and professional-looking colors every time. Experiment with color combinations to create unique and personalized designs for your projects.
Applying the Dye to the Fabric
Applying the dye is an exciting step in the Tulip Tie-Dye process; Once mixed‚ the dye is ready to use. Shake the bottles thoroughly before applying to ensure even color distribution. Use the squeeze bottles to apply the dye directly to the folded fabric‚ working in a well-ventilated area. For bold results‚ saturate the fabric evenly‚ but avoid over-saturating‚ as this can lead to color bleeding. Experiment with different application techniques‚ such as dripping or spraying‚ to achieve unique effects. The one-step formula makes it easy to apply the dye without pre-soaking the fabric. This step is where your creativity truly shines‚ bringing your tie-dye design to life.
Waiting for the Dye to Set
After applying the dye‚ it’s crucial to let it set properly. The Tulip Tie-Dye instructions recommend waiting 6 to 8 hours for the best results. Cover the fabric with plastic wrap or a damp cloth to prevent drying out. Avoid disturbing the fabric during this time‚ as it can disrupt the color bonding. The longer the dye sets‚ the more vibrant the colors will be. If you’re in a hurry‚ a minimum of 4 hours is acceptable‚ but 6-8 hours yields the most intense hues. Patience is key for achieving professional-looking results with your Tulip Tie-Dye project.
Rinsing and Washing the Fabric
After the dye has set‚ gently rinse the fabric under cold running water to remove excess dye. Use mild detergent and wash in cold water separately from other clothes to prevent color transfer. Avoid fabric softeners‚ as they can affect color vibrancy. Do not soak the fabric‚ as this may cause colors to bleed. Rinse thoroughly until the water runs clear. This step ensures the dye is fully removed and the design is set. Proper washing helps maintain the integrity of the tie-dye pattern and prevents fading. Follow these steps carefully to achieve long-lasting‚ professional-looking results with your Tulip Tie-Dye project.
Drying and Curing the Design
Once rinsed‚ allow the fabric to air dry away from direct sunlight to prevent fading. For optimal results‚ do not dry in a dryer. After drying‚ iron the fabric inside out on a low setting to cure the design. This step ensures the colors are vibrant and long-lasting. Proper curing enhances color durability and prevents fading. Follow these steps to achieve professional-looking results with your Tulip Tie-Dye project. Proper drying and curing are essential for maintaining the integrity of the design and ensuring the colors remain bold and vibrant over time.

Safety Tips for Tulip Tie-Dye
Always wear gloves and protective clothing to avoid skin staining. Cover work surfaces with plastic or old sheets to prevent dye leakage and damage.
Protecting Skin and Surfaces
When working with Tulip Tie-Dye‚ wear gloves to prevent skin staining. Use old sheets or plastic covers to protect work surfaces from dye leakage. Ensure good ventilation to avoid inhaling fumes. Avoid direct skin contact with dye‚ as it may cause irritation. If dye spills‚ clean immediately with soap and water. Protecting your skin and surfaces ensures a safe and enjoyable tie-dye experience. These precautions help maintain a clean workspace and prevent accidental stains. Always prioritize safety to fully enjoy the creative process of tie-dye with Tulip kits.
Proper Disposal of Dye
After completing your Tulip Tie-Dye project‚ dispose of leftover dye responsibly. Do not pour dye down drains‚ as it can harm water systems. Instead‚ seal unused dye in its original container and discard it with household waste. If dye has dried‚ it can be safely thrown away. For liquid dye‚ mix with absorbent material like sand or kitty litter before disposal. Always follow local regulations for hazardous waste. Proper disposal ensures environmental safety and prevents contamination. Clean tools with soap and water before reuse. This eco-friendly approach helps maintain a sustainable crafting practice with Tulip Tie-Dye kits.
Troubleshooting Common Issues
Address dye leakage by checking bottle seals and tightening caps. For uneven colors‚ rinse gently and reapply dye as needed for vibrant‚ consistent results with Tulip Tie-Dye.
Fixing Uneven Color Distribution
Uneven color distribution can occur due to improper folding or insufficient dye application. To fix this‚ gently rinse the fabric and reapply dye to lighter areas. Ensure folds are tight and evenly coated. For best results‚ let the dye set for 6-8 hours as recommended by Tulip Tie-Dye Kits. If colors still appear uneven‚ consider re-washing and reapplying dye. Proper folding techniques and adequate dye saturation are key to achieving vibrant‚ consistent results. Experiment with different folding methods to enhance color distribution and create unique patterns. This step ensures your tie-dye project turns out as envisioned‚ with professional-looking results every time.
Addressing Dye Leakage Concerns
Dye leakage can occur if bottles are not sealed properly or shaken excessively. To prevent this‚ ensure caps are tightly closed and avoid vigorous shaking. If leakage happens‚ rinse the affected area with cold water before it sets. For Tulip Tie-Dye Kits‚ check bottles for cracks or damage before use. Secure bottles with rubber bands if needed. Proper handling and storage of dye bottles will minimize leakage risks. Always follow the manufacturer’s instructions for mixing and applying dye. By taking these precautions‚ you can enjoy a mess-free tie-dye experience and achieve professional-quality results with your Tulip Tie-Dye project.

Creative Variations for Tulip Tie-Dye
Explore creative variations with Tulip Tie-Dye by experimenting with unique folding techniques and vibrant color combinations for one-of-a-kind designs. From intricate patterns to bold statements‚ Tulip kits offer endless possibilities for artistic expression.
Exploring Different Folding Techniques
Folding fabric is a key step in creating unique Tie-Dye patterns. From simple accordion folds to intricate origami-inspired designs‚ each technique yields distinct results. The Itajime fold‚ for instance‚ involves folding fabric into shapes like squares or triangles before dyeing‚ resulting in geometric patterns. Other methods include the spiral fold for a swirling effect or the bunny ear fold for symmetrical designs. Tulip Tie-Dye kits make it easy to experiment with these techniques‚ as they provide pre-measured dyes and clear instructions. By mastering different folds‚ you can achieve professional-looking results and add a personal touch to your projects. Experiment with folds and colors to create truly one-of-a-kind designs!
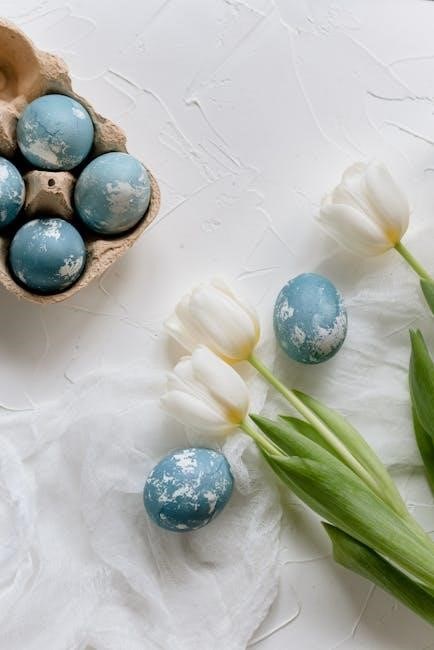
Combining Colors for Unique Effects
Experimenting with color combinations can elevate your Tie-Dye projects to the next level. Tulip Tie-Dye kits offer a wide range of vibrant hues that can be mixed and matched to create stunning effects. For a soft‚ pastel look‚ combine light colors like pink and baby blue. For a bold statement‚ mix bright shades such as yellow and orange. Layering colors can also produce multi-tonal effects‚ adding depth to your designs. Remember‚ the key to achieving unique results is to let your creativity flow and explore different color pairings. With Tulip‚ the possibilities are endless‚ allowing you to craft truly personalized pieces.
History of Tie-Dye and Tulip
Tie-dye has ancient roots‚ but Tulip revolutionized the craft with user-friendly kits‚ making it accessible to everyone and sparking a modern DIY creative movement worldwide.
Origins of Tie-Dye
Tie-dye‚ an ancient textile art‚ traces its roots to Africa‚ Asia‚ and South America. Techniques like shibori in Japan and bandhani in India date back centuries. These methods involved folding‚ tying‚ or stitching fabric to create unique patterns before dyeing. The practice spread globally‚ evolving with cultural influences. In the 1960s‚ tie-dye became a symbol of counterculture in the West‚ popularized by hippie movements. Today‚ Tulip kits have modernized the craft‚ offering easy-to-use supplies that make tie-dye accessible to everyone‚ from DIY enthusiasts to professionals‚ ensuring its timeless appeal endures in fashion and art.
Tulip’s Role in Popularizing Tie-Dye
Tulip has played a significant role in making tie-dye accessible and mainstream. With their innovative one-step kits‚ they simplified the process‚ eliminating the need for pre-soaking fabrics in soda ash. This user-friendly approach has attracted crafters of all skill levels‚ from beginners to professionals. Their kits‚ like the popular Tulip One-Step Tie-Dye Party Kit‚ have become a staple for DIY enthusiasts‚ offering vibrant colors and easy-to-follow instructions. By providing high-quality‚ affordable products‚ Tulip has helped revive and popularize tie-dye‚ turning it into a trendy activity for parties‚ workshops‚ and personal projects. Their influence has kept tie-dye relevant in modern fashion and DIY culture.
Cultural Impact of Tie-Dye
Tie-dye has become a cultural phenomenon‚ influencing fashion‚ art‚ and social media. From high-end brands like Prada to DIY projects‚ it symbolizes creativity and self-expression‚ uniting people across generations.
Tie-Dye in Fashion and Art
Tie-dye has transcended its 1960s roots‚ becoming a staple in modern fashion and art. Designers like Prada and brands like Forever 21 incorporate tie-dye into their collections‚ while artists use it as a medium for creative expression. The technique’s versatility allows it to grace everything from silk scarves to denim‚ making it a favorite in both high-end and streetwear. Its vibrant‚ unique patterns have also inspired home decor and accessories‚ further cementing its influence. With Tulip kits‚ anyone can explore this art form‚ blending tradition with contemporary style and fostering a culture of DIY creativity that continues to evolve and captivate audiences worldwide.
Tulip’s Influence on Modern Trends
Tulip has played a significant role in revitalizing tie-dye as a modern trend‚ making it accessible and fun for everyone. Their easy-to-use kits have inspired a new generation of DIY enthusiasts‚ turning tie-dye into a cultural phenomenon. From loungewear to high-fashion collections‚ Tulip’s vibrant colors and user-friendly products have helped tie-dye transition from a nostalgic craft to a contemporary staple. Social media platforms like Instagram and TikTok showcase the trend’s resurgence‚ with many crediting Tulip for its mainstream comeback. By simplifying the process‚ Tulip has empowered individuals to express their creativity‚ fostering a community that celebrates personalized fashion and artistic self-expression.
Modern Trends in Tie-Dye
Tie-dye has surged in popularity‚ with vibrant designs dominating 2025 fashion. From high-fashion collections to casual loungewear‚ the trend offers a fresh take on classic styles‚ fueled by DIY kits.
Tie-Dye in Contemporary Fashion
Tie-dye has become a staple in 2025 fashion‚ with designers incorporating vibrant‚ hand-crafted patterns into high-end collections and casual wear alike. Brands like Prada and Forever 21 feature tie-dye in their lines‚ while DIY enthusiasts use Tulip kits to create unique pieces. The trend extends beyond clothing‚ with tie-dye appearing on accessories‚ home decor‚ and even matching family outfits. Its resurgence reflects a desire for individuality and craftsmanship in fast fashion; Whether for statement pieces or everyday looks‚ tie-dye offers a fresh‚ artistic twist‚ making it a defining element of contemporary style.
Tulip’s Contribution to DIY Culture
Tulip has revolutionized DIY culture by making tie-dye accessible to everyone. Their user-friendly kits empower individuals to create unique‚ professional-quality designs without professional expertise. The one-step process simplifies the craft‚ encouraging creativity and experimentation. Tulip’s products have become a staple in DIY communities‚ fostering a sense of accomplishment and self-expression. By providing affordable and easy-to-use tools‚ Tulip has democratized fashion‚ allowing people to personalize their clothing and home decor. This has not only boosted creativity but also strengthened the DIY movement‚ making tie-dye a mainstream activity enjoyed by crafters of all skill levels.
Frequently Asked Questions
Common queries include how to prevent dye leakage‚ optimal setting times‚ and achieving vibrant colors. Tulip Tie-Dye Kits offer easy‚ mess-free solutions for stunning results.
Common Queries About Tulip Tie-Dye
Many wonder about preventing dye leakage and achieving vibrant colors. Tulip Kits are designed for ease‚ with one-step processes and mess-free application. Users also ask about fabric preparation and optimal dye setting times‚ typically 6-8 hours. Others inquire about color combinations and folding techniques for unique patterns. Safety concerns‚ like protecting surfaces and skin‚ are also common topics. Additionally‚ questions arise about the durability of colors after washing and how to care for tie-dye items. These queries highlight the popularity and versatility of Tulip Tie-Dye Kits for both beginners and experienced crafters.
Tips for Achieving Professional Results
To achieve professional-looking tie-dye‚ start by following the instructions carefully. Use rubber bands to create crisp folds and ensure tight binding for bold patterns. Prevent dye leakage by sealing fabric thoroughly. For vibrant colors‚ shake dye bottles well and apply evenly. Allow the dye to set for 6-8 hours for optimal results. Wash fabrics beforehand to remove finishes that might affect dye absorption. Wear gloves to protect your hands and work on a covered surface. Experiment with folding techniques like accordion or spiral folds for unique designs. Rinse gently in cold water to preserve colors. These tips will help you create stunning‚ long-lasting tie-dye designs with Tulip Kits.
Unleash your creativity with Tulip Tie-Dye Kits! With easy steps and vibrant results‚ tie-dye becomes a fun‚ rewarding experience for all skill levels. Happy crafting!
Final Thoughts on Tulip Tie-Dye
Tulip Tie-Dye kits offer a fun and creative way to transform fabrics into vibrant works of art. Perfect for all skill levels‚ these kits make tie-dye accessible and enjoyable. With their easy-to-use‚ one-step process‚ you can achieve professional-looking results without the hassle. The wide range of colors and tools provided ensures endless possibilities for unique designs; Whether you’re crafting with friends or exploring your solo creativity‚ Tulip Tie-Dye kits deliver stunning outcomes. Their versatility and reliability make them a must-try for anyone looking to add a personalized touch to their fabrics. Embrace the creativity and self-expression that Tulip Tie-Dye brings to your projects!
Encouragement to Try Tulip Kits
Don’t hesitate to dive into the world of tie-dye with Tulip Tie-Dye Kits! These kits are designed to make the process fun‚ easy‚ and rewarding for crafters of all skill levels. Whether you’re hosting a tie-dye party or enjoying a solo creative session‚ Tulip Kits provide everything you need to achieve vibrant‚ professional-looking results. With their one-step process and wide range of colors‚ you can experiment with unique patterns and designs. Tulip Kits are perfect for transforming ordinary fabrics into extraordinary pieces of art. Embrace your creativity and give Tulip Tie-Dye a try—you’ll love the process and the stunning outcomes!